Flutter
Make the most of this cutting-edge technology by developing apps quickly! Our Flutter solutions have amazing features that can be used to create sleek, high-performance apps that can scale seamlessly across platforms.


We aim to build applications that excel in all aspects. We consider customer satisfaction as the best award we could receive. In that journey, we have been recognized multiple times for the exceptional products we deliver.
Faster work process

Customer Review on Google
Successful projects accross the world
We are a team of highly dedicated mobile app developers that build cutting-edge mobile applications with the latest technologies.
About us
We cater to dedicated and tailored app development to help companies expand and achieve new heights. We deliver great features focusing on the latest technological advancement.

Our expertise in hybrid application development in Kerala, comes by integrating our agile methodology. We are the leading experts in hybrid application development.

Our rank booster packages reap maximum results for ranking mobile apps higher in the highly competitive niche. We get ahead with a proper ASO strategy crafted under our years of ASO experience.

Our landing page creation in a faster mode connects seamlessly with popular marketing platforms. We build efficient landing pages that crush your revenue goals.
We are a team of highly dedicated mobile app developers that build cutting-edge mobile applications with the latest technologies.
View all ServicesMake the most of this cutting-edge technology by developing apps quickly! Our Flutter solutions have amazing features that can be used to create sleek, high-performance apps that can scale seamlessly across platforms.
Explore the endless possibilities of mobile app development with our Figma services. Design compelling apps and refine your tech skills, all while leveraging cutting-edge tools to make a meaningful impact in the industry. Appzoc ensures a seamless user experience.

From startups to enterprises, we specialize in creating Android app development services that drive growth. Our team at Appzoc focuses on developing apps that provide an outstanding experience across all Android devices and wearables.

Node.js, for its high scalability, simplifies the mobile application process and is widely used for real-time applications with many open-source libraries and frameworks. The server-side and client-side switches are easy with Node.js. Node.js developers can constantly publish new code making the app possible as and when needed.
We are a team of highly dedicated mobile app developers that build cutting-edge mobile applications with the latest technologies.
View all Technologies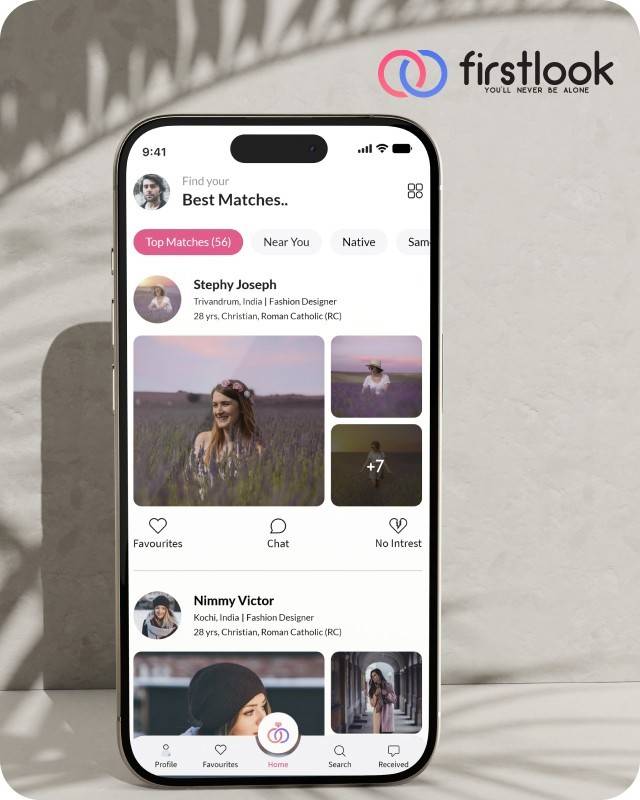
FirstLook Matrimony is a modern matchmaking app that helps you find your perfect life partner with personalized matches, easy chat options, and a secure platform built on trust.


Trustaurant is a travel-friendly food app that helps you discover and order from trusted restaurants nearby or along your journey, all in real-time.
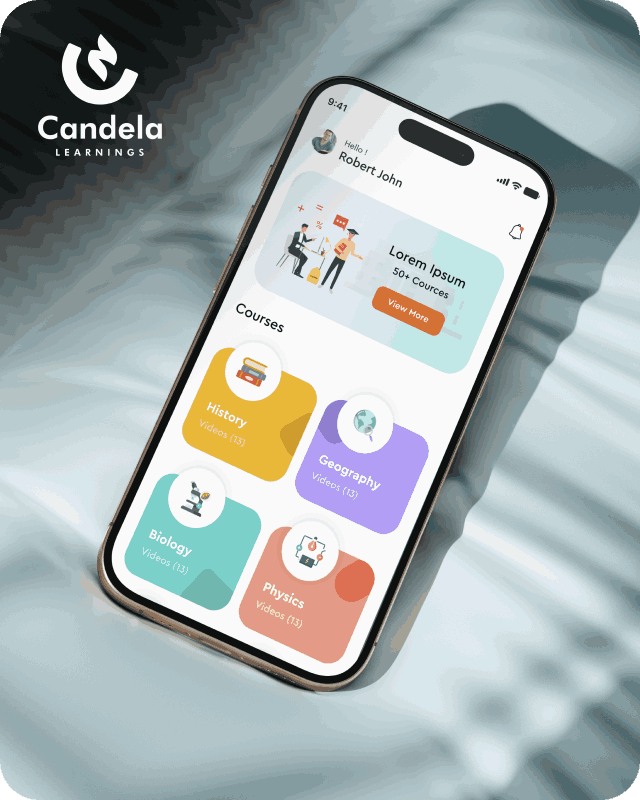
Candela Learnings is an engaging educational app offering interactive video courses in subjects like History, Geography, Biology, and Physics—all in one place.
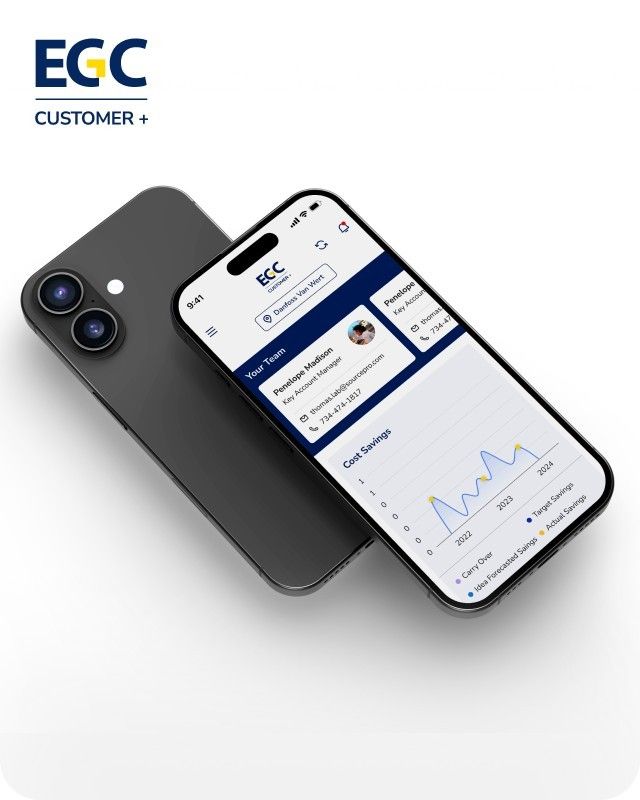
EGC Customer+ is a smart, user-friendly app designed to help you track cost savings, manage key contacts, and stay in control of your account performance—all in one place.
We are a team of highly dedicated mobile app developers that build cutting-edge mobile applications with the latest technologies.
View all WorksWe are a team of highly dedicated mobile app developers that build cutting-edge mobile applications with the latest technologies.
View more openings

If your Flutter app runs smoothly on a flagship device but stutters on a 4GB RAM Android phone, you are not alone. Most teams find the gap here between “it works” and real Flutter app optimisation.
To feel smooth, a Flutter app must lay out each frame in a maximum time budget of 16 milliseconds to achieve a frame rate of 60fps. When time budgets are missed, users experience dropped frames, scroll lag, and animations that stutter. On mid and low range devices, that time budget is much smaller due to resource contention between CPU limitations, reduced RAM, thermal throttling, and background processes.
Flutter is capable of excellent performance. But it rewards discipline. Let’s break down how to optimize your app properly for mid-range Android devices without rewriting it in native code.
On devices with 3–6GB RAM, performance problems usually show up in three places:
When frame rendering crosses the 16ms limit, you get jank. When memory spikes repeatedly, scrolling feels uneven. In markets where storage is sensitive, larger APKs tend to heighten installation friction. In Flutter, official documentation states that performance issues are usually linked to excessive burdens on the UI thread, suboptimal build methods, or oversized layout passes. The first step to optimisation is decreasing that burden.
Never optimize blindly.
Use Flutter DevTools Performance view in profile or release mode. Debug mode distorts timing and gives misleading results. Look at:
If frames exceed 16ms during scrolling or animation, identify which widget rebuild or layout operation is responsible. Flutter provides frame charts specifically to catch this.
Profiling is not optional. It is your baseline.
Most Flutter performance issues stem from inefficient widget rebuilds.
Practical fixes:
Every unnecessary rebuild consumes CPU cycles. On low-end hardware, the cost compounds quickly.
A deep widget tree is not inherently bad, but frequent rebuilds across large trees are. The intended purpose is to do precision updates instead of doing global refreshes. The goal is precision updates, not global refreshes.
A common error is to render everything at the same time.
Instead of building long lists inside a Column, use ListView.builder or GridView.builder. These render only visible items. This approach reduces memory footprint and initial layout time.
Lazy loading is equally important for data. Avoid preloading large datasets during startup. Fetch incrementally. Paginate API calls. Defer non-critical modules until they are needed.
On mid-range Android devices, loading less upfront directly improves perceived speed.
Large binaries affect startup time and install rates.
Flutter performs tree shaking during compilation to remove unused Dart code. You can strengthen binary size reduction by:
Smaller apps will launch more quickly and are less likely to exceed the storage capacity of low-cost smartphones.
Images typically use up more space than anticipated.
Best practices:
Large uncompressed assets increase memory allocation and trigger garbage collection cycles. That leads to frame drops.
Fancy UI effects cost GPU cycles.
To maintain a junk-free UI:
While we do not seek to have a plain or boring interface, we do seek to improve performance. When it comes to slow or older devices, it’s better to have responsive interactions over visually complex ones.
Developing using emulators is not enough. Mid-tier Android devices should be used for testing during development. Performance behaviour changes significantly under thermal throttling or when background apps consume memory.
Run tests in release mode. Monitor frame rendering consistency. Check startup time on fresh installs. Measure memory usage after extended sessions.
Optimisation is continuous. It is not a one-time pass before launch.
When your Flutter app maintains a stable 60fps performance, users notice. When it stutters, they notice even faster.
Dropped frames lead to:
In markets dominated by mid-range devices, performance is not a luxury. It is a baseline expectation.
Flutter app optimization is not about tweaking random settings. This is mostly about understanding frame budgets, managing rebuilds, minimising binary size, and understanding the hardware. Knowing When to Get External Help. If your app continues to drop frames despite previous optimisations, it can indicate a need for a more profound architectural analysis. A lot of patterns tend to repeat when it comes to more experienced teams for developing Flutter apps in Bangalore. Some of these include oversized widget trees, state update inefficiencies, and bloat dependencies that steadily increase memory pressure. A seasoned app development company in Bangalore can conduct performance audits via DevTools profiling, frame analysis, and a set of code refactoring techniques aimed at the lower-mid Android device range. When your product demands literal 60fps on actual devices, consider the effort gone into optimisation to be an engineering effort rather than a makeover of your product. Be honest with your codebase. Profile it rigorously. And if needed, bring in specialists who understand how Flutter behaves under real-world constraints.